
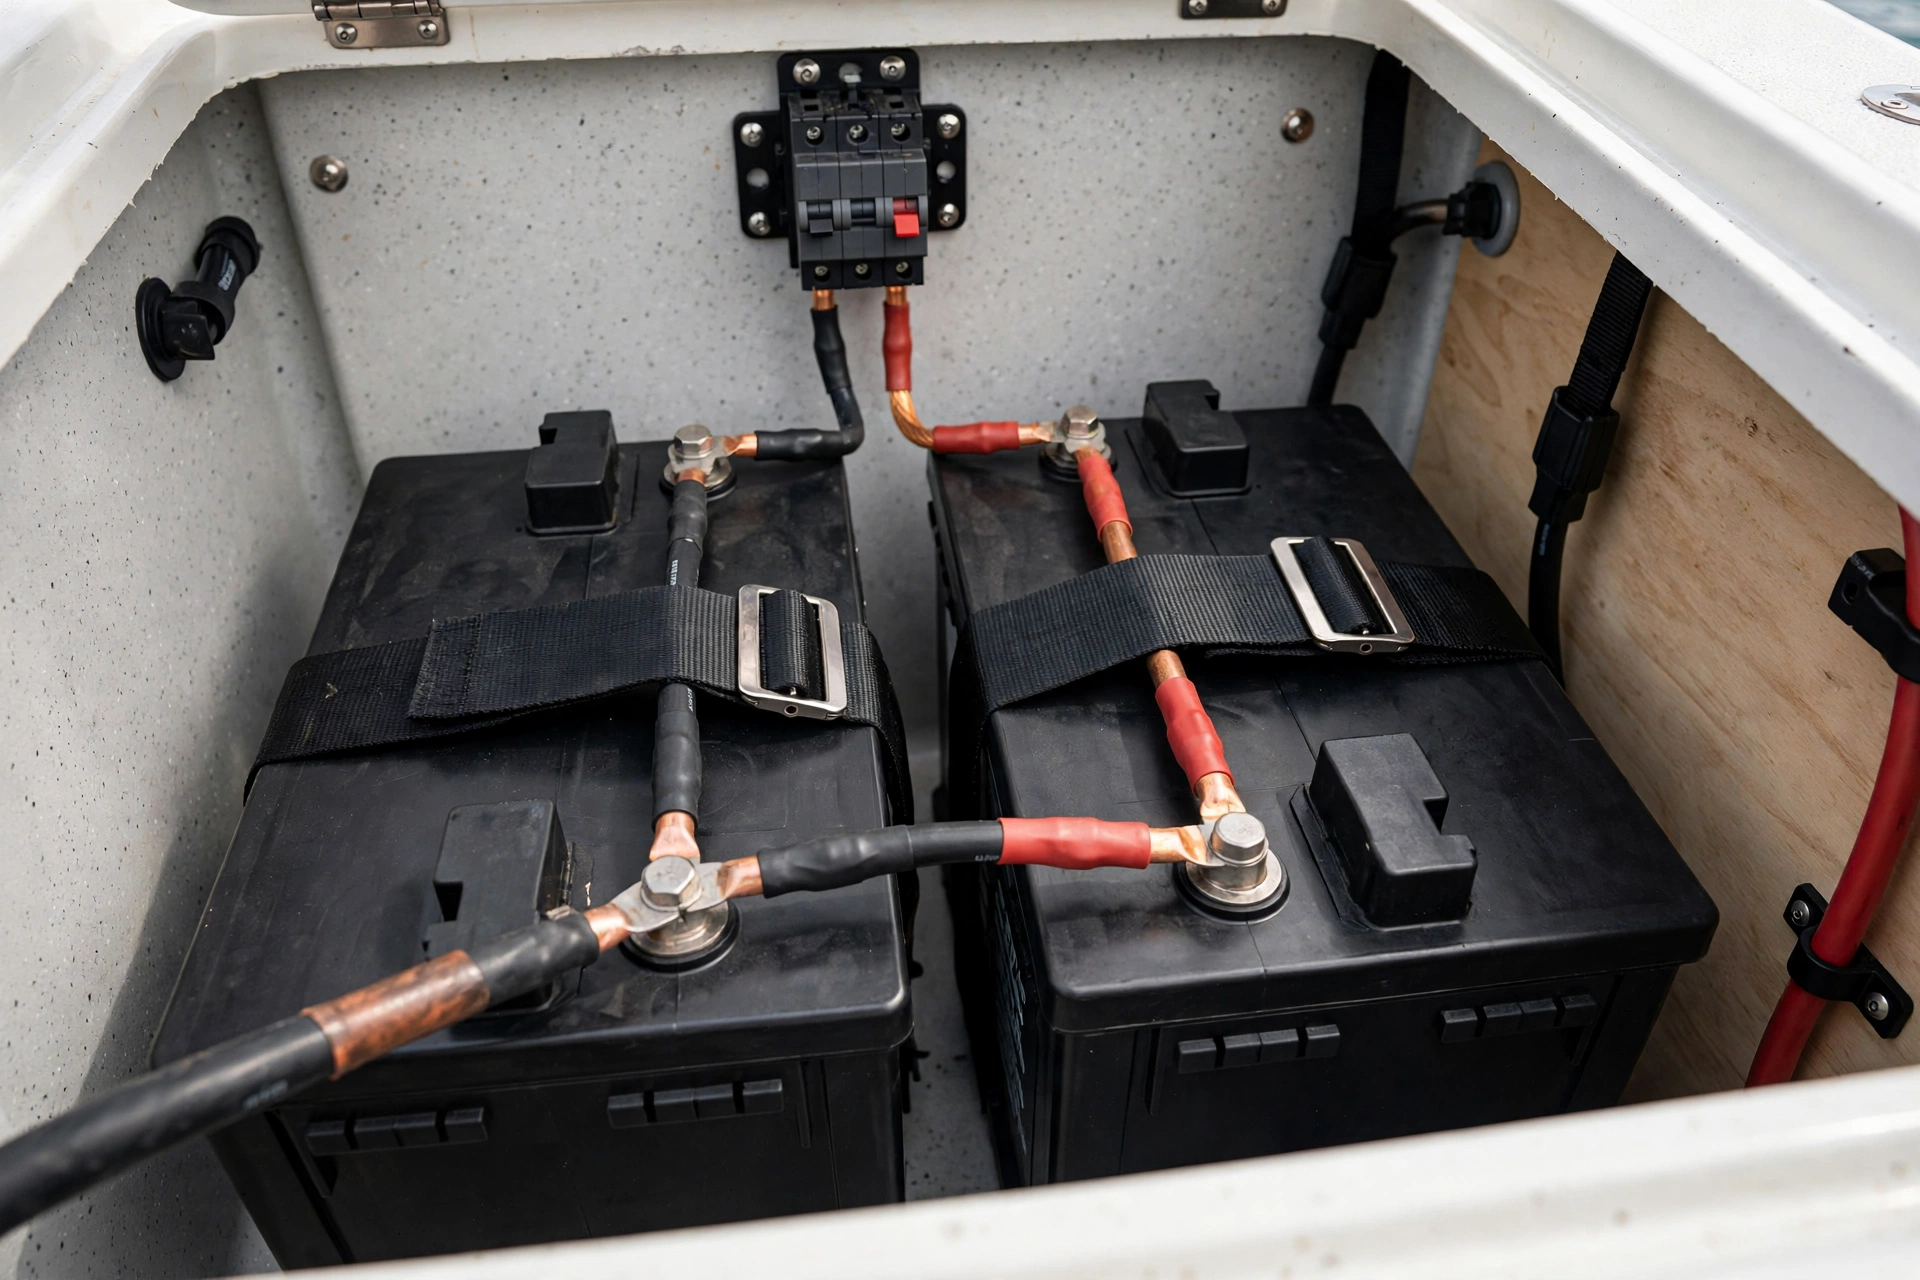
Wiring a 24V or 36V trolling motor system isn’t complicated. However, getting it wrong means weak performance, tripped breakers, or worse. Whether you’re upgrading from 12V or rigging a new boat, this guide gives you the exact 24V trolling motor wiring diagram, the 36V version, wire gauge recommendations, and the safety rules that matter.
12V vs 24V vs 36V: Which System Do You Need?
Voltage isn’t about speed. Instead, it’s about efficiency and endurance:
- 12V (one battery): fine for small boats and calm water with motors up to about 55 lbs of thrust. If you’re unsure, for example, start with our trolling motor thrust guide.
- 24V (two batteries in series): the sweet spot for most bass boats and bay boats. As a result, you get more thrust, longer run time, and less current draw per battery.
- 36V (three batteries in series): for big water, heavy boats, and high-thrust motors (80+ lbs). Consequently, you get maximum efficiency and the longest run times.
Higher voltage means lower amperage for the same power. Therefore, thinner wire runs cooler and batteries last longer. For battery chemistry, see our lithium vs AGM battery guide.
What You’ll Need Before You Start
- Two (24V) or three (36V) identical 12V deep-cycle marine batteries. Specifically, use the same brand, age, and capacity
- Marine-grade tinned copper wire (see gauge chart below)
- A marine circuit breaker or fuse (sized below). In addition, mount it within 7 inches of the battery
- Heat-shrink ring terminals and a proper crimper
- Dielectric grease for all connections
- A marine-grade plug and receptacle rated for your amperage
24V Trolling Motor Wiring Diagram (Series)
First, wire the two 12V batteries in series — positive to negative — to add their voltages:
- First, place the batteries side by side and secure them in battery boxes or trays.
- Next, connect a jumper cable from the negative (−) terminal of Battery 1 to the positive (+) terminal of Battery 2.
- Then, your 24V positive feed comes from the positive (+) terminal of Battery 1.
- Similarly, your 24V negative (ground) comes from the negative (−) terminal of Battery 2.
- After that, install the circuit breaker on the positive feed wire, as close to the battery as possible.
- Finally, run the positive and negative feeds to the trolling motor plug receptacle.
You now have 24 volts across the two free terminals. At this point, a voltmeter should read roughly 24–25.5V on a full charge.
36V Trolling Motor Wiring Diagram (Series)
The 36V setup follows the same principle with three batteries:
- First, secure all three batteries in boxes or trays.
- Next, jumper from Battery 1 negative (−) to Battery 2 positive (+).
- Then, jumper from Battery 2 negative (−) to Battery 3 positive (+).
- After that, take your 36V positive feed from Battery 1 positive (+).
- Similarly, take your 36V negative from Battery 3 negative (−).
- Finally, install the circuit breaker on the positive feed, close to the batteries, then run to the plug.
Full charge should read roughly 36–38V across the feeds. However, never mix battery ages or types in a series bank — the weakest battery drags the whole system down.
Wire Gauge Chart: What Size Wire for a Trolling Motor?
Undersized wire is the number-one DIY mistake. Specifically, it causes voltage drop, heat, and lost thrust. Therefore, use marine-grade tinned copper wire:
| System | Run length (one way) | Recommended wire |
|---|---|---|
| 24V | Up to 15 ft | 8 AWG |
| 24V | 15–25 ft | 6 AWG |
| 36V | Up to 15 ft | 8 AWG |
| 36V | 15–25 ft | 6 AWG |
| 24V / 36V | Over 25 ft | 4 AWG |
When in doubt, go one size larger. After all, the cost difference is small and the safety margin is real.
Circuit Breaker Sizing and Placement
- For 24V systems, a 50-amp breaker is standard for most motors up to 80 lbs thrust.
- For 36V systems, use 50–60 amps depending on the motor’s max draw. In this case, check your motor’s spec plate.
- In addition, mount the breaker within 7 inches of the battery positive terminal, in a dry, accessible spot.
- Finally, use a manual-reset marine breaker, not an automotive fuse, so you can reset on the water.
Trolling Motor Wiring Safety Checklist
- First, disconnect all batteries before touching any wiring.
- Remember, never wire batteries in parallel when you need series — parallel adds capacity, not voltage.
- Also, keep positive terminals covered to prevent accidental shorts from tools.
- Use only marine-grade tinned wire, because automotive wire corrodes fast in a bilge.
- In addition, seal every connection with adhesive-lined heat shrink.
- Also, secure batteries so they can’t shift in rough water.
- Finally, test voltage at the plug before connecting the motor.
Frequently Asked Questions
Can I run a 24V trolling motor on one 12V battery?
No. A 24V motor on 12V will barely turn, run hot, and can damage the control board. Therefore, always match the battery bank to the motor’s rated voltage.
Do I need special batteries for 24V or 36V?
You need deep-cycle marine batteries, all identical in type, brand, and age. For example, lithium (LiFePO4) banks are increasingly popular for the weight savings — see our lithium battery installation service.
Why does my breaker keep tripping?
Usually it’s undersized wire causing voltage drop (the motor draws more amps to compensate), a prop fouled with line, or a breaker rated too low. Fortunately, our troubleshooting guide walks through the full diagnosis.
Can I charge 24V/36V batteries with a regular charger?
Use a multi-bank marine charger with one bank per 12V battery, or a charger with a dedicated 24V/36V mode. However, never charge a series bank as a single unit with a 12V charger.
Prefer It Done Right? We Wire Boats Every Day
Clean, safe rigging is what we do. So if you’d rather not spend your Saturday crimping terminals, our technicians handle complete trolling motor installation and battery system wiring across Southern California. Contact us or call 714-580-1492 for a quote.